Microcement bathroom with a walk-in shower: how to avoid leaks
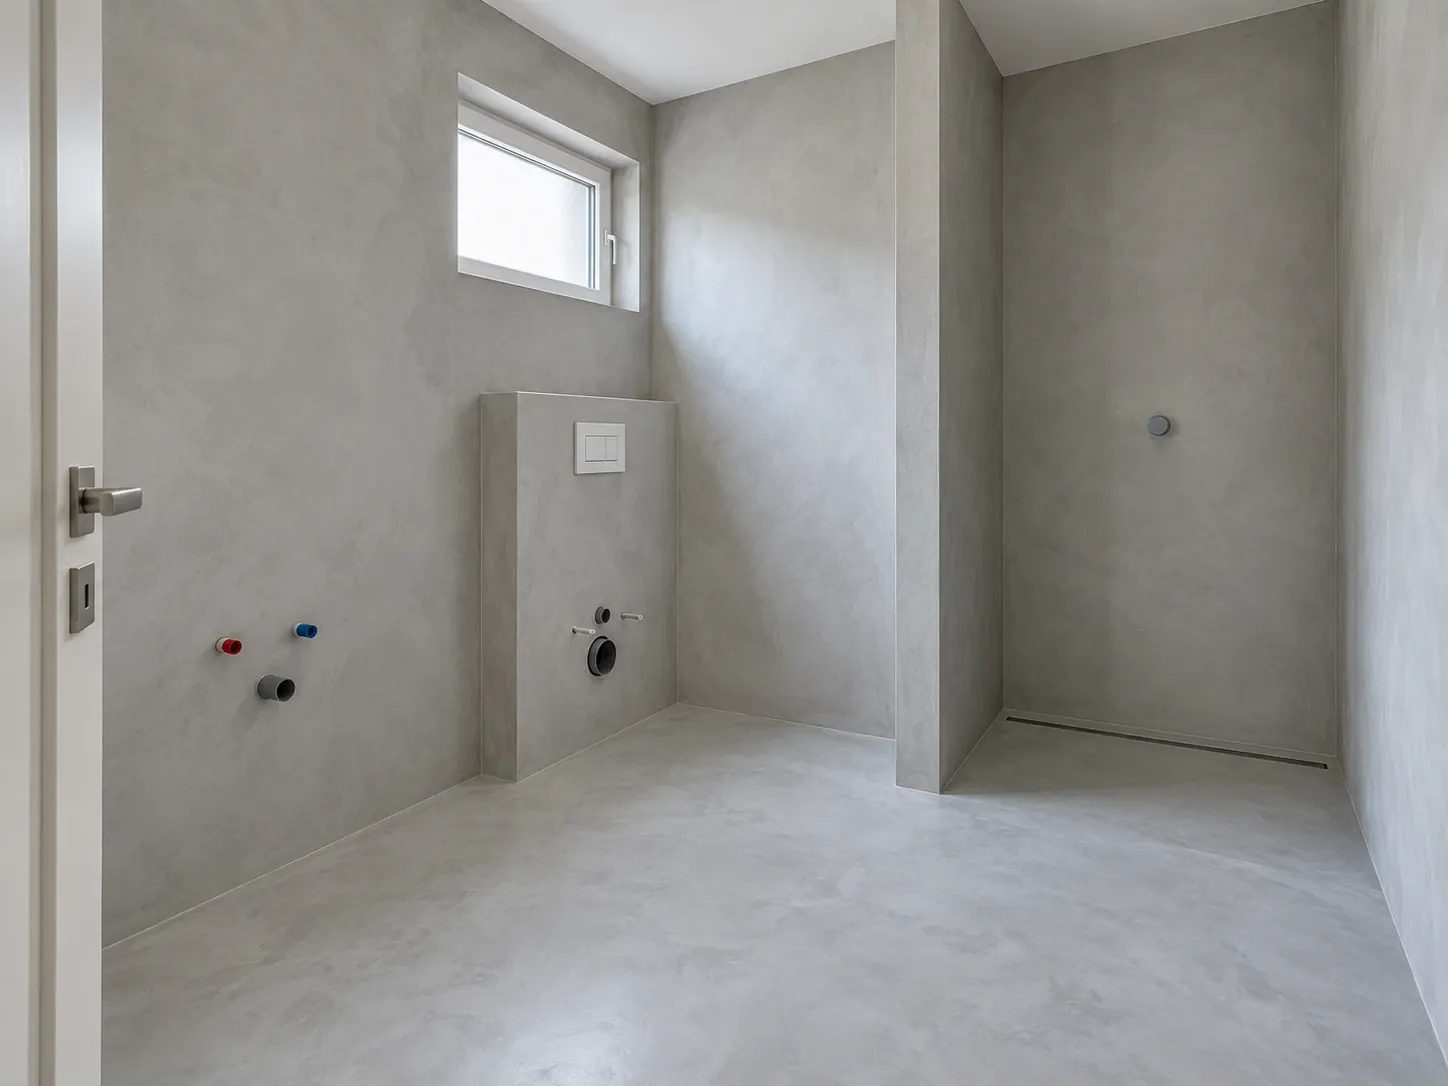
A microcement bathroom looks like a single volume: walls, floor and shower flow into one another without grout or steps. It is one of the most beautiful effects this material offers, and also the place where workmanship errors cost the most. The good news is that leaks are not a property of microcement but the result of skipping part of the system. Below we go through every part in turn.
Published · 4 min read
Watertightness is a system, not one layer
Microcement is a thin mineral coating. On its own it is not watertight, just like plaster or grout. In a bathroom it is the top layer of a system in which every element has a job. The substrate carries loads and must be stable. Waterproofing stops water. Microcement provides the look and mechanical resistance. The sealer closes the structure, repels water and makes cleaning easier.
If any of these elements is missing, the bathroom may look fine for a few months, but water will eventually find its way in. That is why, before we talk about colour, we always talk about what is underneath.
The shower area: falls and drain
In a walk-in shower water must drain by itself, without standing. This is the job of the floor fall, which is prepared before microcement is applied. It is usually around two per cent, but the exact value depends on the size of the area and the type of drain.
A linear drain along the wall allows a fall in one direction only, which looks good in microcement because the floor plane stays calm. A point drain needs falls from several sides and slightly changes the floor geometry. Both are correct. What matters is that the drain has a collar to bond with the waterproofing and is installed before our work, at the right height.
Waterproofing step by step
Waterproofing is a flexible membrane applied to the substrate across the whole wet area. Its weakest points are where things meet or pass through the wall.
- Sealing tapes in wall corners and where walls meet the floor.
- Collars around pipes and tap outlets.
- The drain collar embedded in the waterproofing.
- The membrane applied in the recommended number of coats, with drying times from the data sheet.
- An area wider than the shower itself, because water splashes further than you think.
Ventilation: the invisible ally
Even a perfectly watertight bathroom needs working ventilation. Steam condenses on cold surfaces, and lasting moisture harms furniture edges, silicone and ceiling paint. Sealed microcement copes well with steam, but the whole bathroom benefits from drying quickly after a shower. Check that the vent draws air, and if the bathroom has no window, consider a fan with a run-on timer.
Safety: is microcement slippery in the shower
A smooth, glossy sealer on a wet floor can be slippery. That is why in the shower we use protection with more grip, while the rest of the bathroom can be finished smoother. The difference is barely visible, but you feel it underfoot immediately. If children or older people use the bathroom, tell us at the survey and we will choose a finish with extra grip.
The most common mistakes, easy to avoid
Most problems with microcement bathrooms have a few recurring causes.
- Skipping waterproofing because "microcement is waterproof anyway".
- No fall, or a fall in the wrong direction, so water stands in a puddle.
- Using the shower before the sealer has fully cured.
- Aggressive limescale and chlorine cleaners that dull the sealer.
- Silicone in corners instead of a continuous coating, which darkens over time.
How to care for a microcement bathroom
Day to day, a soft cloth and a mild, neutral cleaner are enough. Limescale from hard water is best removed as you go, with a squeegee after showering, rather than letting it build up. Do not use acidic descalers or abrasive powders. After a few years of intensive use the sealer can be refreshed without replacing the whole coating. We hand over care instructions at completion, together with the two-year warranty document.
How long a bathroom takes and when you can shower
A microcement bathroom usually takes a few working days, not because the work is slow but because each layer needs time to dry: first the waterproofing, then two layers of microcement with sanding in between, and finally the sealer. Rushing this stage is the most common cause of problems that only show months later.
After the last coat of sealer the shower can be used only after the time given in the data sheet. If your home has only one bathroom, plan to shower with family or at the gym during that time. We give the exact schedule in the quote so you can prepare for it.
Checklist before work starts
Before we arrive, it helps to have these settled. Each affects how we run the coating.
- The drain installed at the right height, with a collar for the waterproofing.
- Tap connections, including concealed ones, and lighting cables in place.
- A decision on niches, shelves and a bench in the shower.
- Sanitaryware and furniture chosen, with dimensions, so we can plan junctions and openings.
- Colour and texture approved on a sample.
- Working ventilation, checked before the walls are closed.